6 Tips to Perfect Scenic Photos, by a Phuket Photographer
While some people have a natural eye for photography, it’s not much use without the technical ability to snap the perfect photo. Modern tools such as the iPhone help to some extent but there are still tricks of the trade anyone can learn easily with the practice that will take your photography game to new levels and maybe one day you will even be called a professional Phuket Photographer yourself.
We will mostly use pictures from a travel project we shot as a case study and a small amount of our work as a
real estate photographer, sharing some of the techniques and thought processes that went into creating some beautiful photography in Phuket. This article is the result of 14 years working on the island and a huge amount of technical knowledge condensed into just what you need to take your landscape photography to professional looking levels by just following the 6 simple steps and putting them into practice.
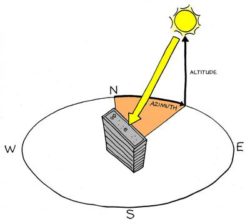
“Lighting you say? I don’t own any lights!” – Says you. Actually, we all have access to a fantastic source of free lighting here in Thailand (for most of the year), the sun! The sun is our best friend or worst enemy as a
Phuket Photographer. Now here is how you can harness the sun to become the perfect source of light for your next photo. Firstly you must make sure it’s behind the camera unless you are shooting a sunrise or sunset. When the sun is behind you, it is shining on wherever your camera is facing. If you want blue skies, vibrant jungle colors, and sparkling waters make sure the sun is between 9 pm and noon, rising behind you because as it gets past noon, the sky in front of you will whiten and you need to rotate the camera in the opposite direction. If you stick to that Phuket Photography basic you will do alright but now for something a little more advanced… If the sun is 90 degrees on an angle, you can employ the use of a polarizer. A polarizer will minimize reflections and bring back the color but only when it’s near 90 degrees off camera to you. As a professional Phuket Photographer, my polarizer rarely leaves my wide angle lens.
Photography composition is quite a complicated subject which you can get more information on by
clicking here but here I have summarized the quickest and easiest methods of quickly improving your Phuket Photography skills. These techniques are also highly valuable as a real estate photographer in Phuket where time and time again you see amateur photographers breaking every one of the below steps to create terrible pictures. First things first, make sure your camera is level! Pick some lines in the distance, be it a horizon, the edge of a wall or a road. Now using the lines of your camera screen which you’ve hopefully enabled, match them up to the lines of your environment. Just look how bad this wonky image looks vs the correct method of Photography in the straight image.

The next part of composition we will look at is called leading lines and while working as a Phuket Photographer shooting tropical landscapes and for real estate photography I found it most valuable. Look at Rawai Pier and notice how the lines start thick and close to the camera, then head inwards, giving a three-dimensional image and sometimes leading towards a point of focus in the image. In the
real estate photographer example the lines come from the edges of the wall and even the furniture which was all lined up parallel to draw your eye to the length of the room.


The Rule of Thirds is the next easy to remember technique you should summon on your quest for perfect Phuket Photography. Most cameras will give you the option to have a 9 square grid. The idea is that the points of interest in the photo should not be in the center of the image but slightly off to the sides as shown in this graphic below. It doesn’t have to be perfect as sometimes this will mean cutting off important parts of your image but if you use it as a general guide to have the important parts of an image, such as a face at the grid intersections, this should improve your Photography in Phuket.
This sound’s simple but many people struggle with taking sharp pictures due to the motion blur of shaky hands so here are a couple of quick fixes. Firstly, control your breath during a snap and slowly breathe out as you hit that camera button. Secondly, find something to lean on. If you can support your arms by resting on your sitting legs, on an armrest or against a wall, you can minimize some of the micro-shakes any Phuket Photographer will struggle with when not using a tripod. Obviously using a tripod is the ideal method and they can be picked up very cheap from the likes of stores in Central Festival or online at Lazada where you will find even better deals. One last note is if you’re a budding real estate photographer in Phuket a tripod is vital! Interiors are generally quite dark, therefore you will likely get blurry images without the use of a tripod.
Do you like what you see but it’s looking a bit boring in the camera? Maybe there is something ugly on one

side and you would like to hide that? Well, you can do what we professional Phuket Photographers call dirtying up the frame to make things more interesting! As you can see in these images below this is as simple as placing something on one side of your camera such as a palm leaf but focusing on something in the distance. Another method is poking your camera slightly through a gap in some trees so the edge of your frame is trees and in the center, you now have your stunning piece of Phuket photography. Palm leaves are probably the most popular method of this here in Thailand but as you can probably tell, the writer of this article tends to favor covering sunsets when he goes out doing travel photography.
The above simple tips will crossover into all styles of photography however one thing that changes from person to person is the camera. While all cameras are a bit different, they all do have a few very basic things in common which dictate getting a clean, blur-free image. For this tip I would like to tell you to learn how to use your camera, if you’re happy with it in full auto mode great but if you’re using a more professional photographer style of camera you should learn about shutter speed, iso, and aperture, not to mention the best lenses to use, all information beyond the scope of one article based on being a better Phuket Photographer.
Most basic cameras these days have the ability to shoot in raw mode, even many camera-phones. What this does is allows you to take much more colorful images than highly compressed jpg’s which most beginners will be using. The raw images allow you to push the saturation of your blue skies, the green in the ocean and adjust the yellow in the trees to give a natural looking image that is full of life. If you attempt to alter the color of a jpg, it fast becomes a blocky mess, just like the life of a Phuket Photographer calling themselves a professional before mastering these 6 steps.
If you study this article and put each of the 6 steps into practice, you will seriously up your game and start blowing people away with your new skills before you know it! Now we would like to finish up with giving some specific tips on shooting certain styles of photography. Just make sure you employ the above skills which now go without saying in the following tips to becoming a better photographer in Phuket.
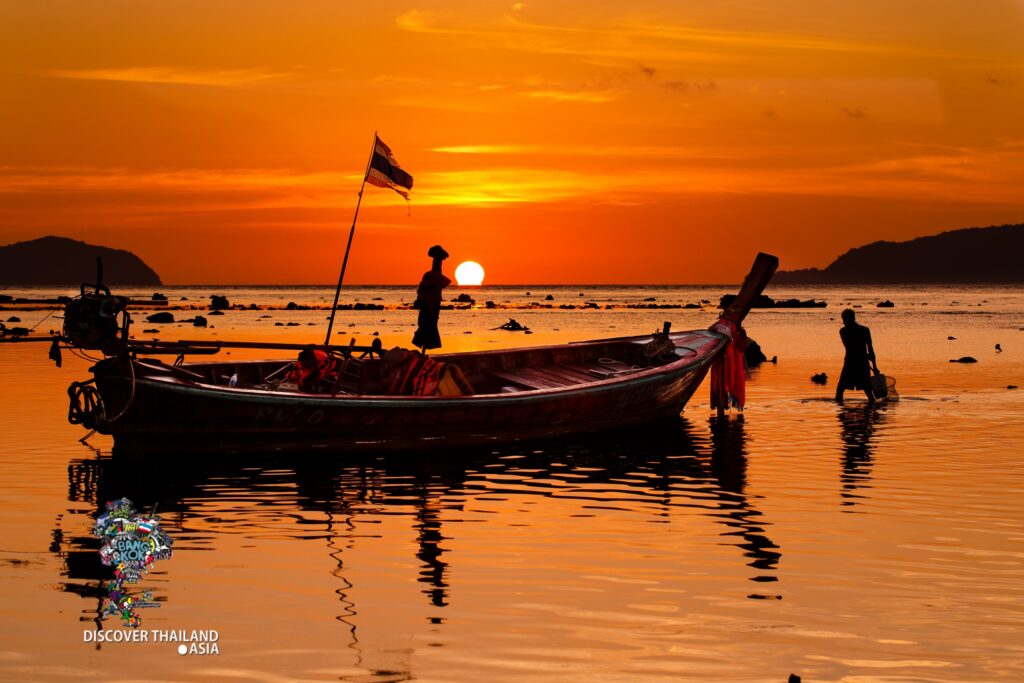
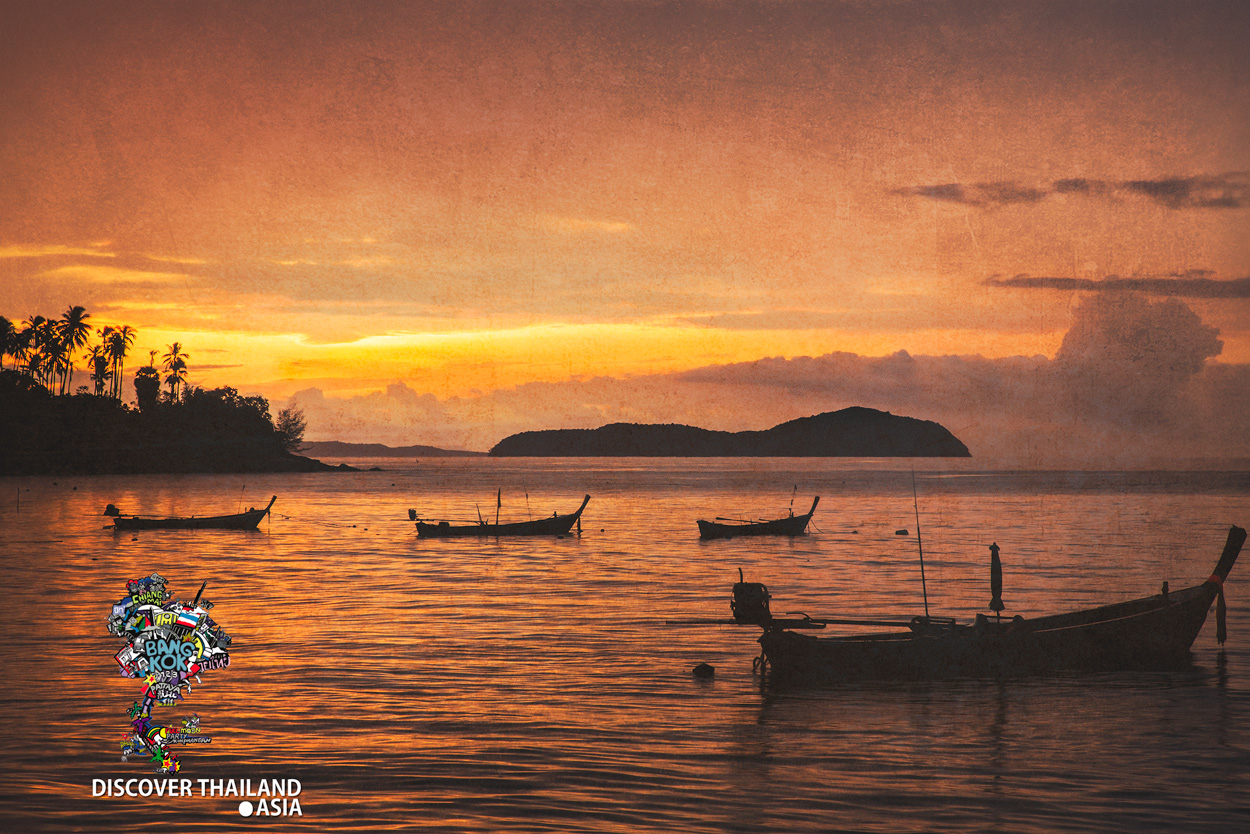
Shooting the Perfect Phuket Sunset and Sunrise
These days many cameras have sunset/sunrise modes installed already but for those who want more control to get even better images here’s how. Normally your exposure setting should be around 0, i.e neutral… Now the simplest trick and must do to get those vivid, fiery colors is to underexpose your image and make it darker. Forget about trying to get your partner in the shot unless she is going to be a silhouette, set the brightness down so the foreground is mostly black and the sky and sea are colorful as hell! Now as you should be shooting in Raw… Sunrises and sunsets are my favorites to play with the color in post! Push those reds towards orange or pink? The world is your oyster as an accomplished Phuket Photographer!
Long Exposure Photography for Milky Smooth Water
A fun style that you can almost bet your friends won’t have tried is long exposure photography for dreamy landscapes that give your water and sky a mystical haze. This method requires a tripod normally unless you are very creative and can find a way to position your camera for a few seconds during one photo. It also requires a camera capable of controlling your shutter speed unless you’re doing night time shots. While it looks and sounds complex it’s actually quite a simple concept that any Phuket photographer should have in their arsenal. First, position your camera and frame using the top 6 tips I gave above and make sure it cannot move. Next, you want to make sure your shutter speed is slow, around 1 second or more is a fun starting point; this is the time it takes to snap that photo. To make this happen, less light needs to reach your camera and you can achieve this with these methods.
- Lowest ISO Setting
- Raise your aperture which makes the hole for light entering smaller
- Place an ND filter in front of your lens
- If it’s a night time shot, shutter-speed will be very slow already
Once you see your shutter speed setting has exceeded 1 second, maybe even 25 seconds or more, hit that button and make sure nothing moves the camera during the time it takes to snap. Hopefully what comes onto the screen next will be your perfect Phuket photographer paradise.

Taking Perfect Selfies
Pretty much every photographer in Phuket will wince at the thought of selfies being classed as real photography but they’re a huge part of this digital age and as such we think it’s worth giving some quick tips on making yourself look the best in these inevitable moments. Posing techniques aside, this is how you can get the most flattering light on whatever shapes you choose to throw at the camera! The most important aspect of perfecting your selfie photography in Phuket is making sure the light hits you at the right angle. Whatever you do avoid noon sunshine hitting from above unless you like dark baggy eyes. If it is noon and you want to take a selfie, attempt to find some shade from the direct sun, stand under a tree or against a wall to keep the light evenly across your face. Shade is where you will get the best light on your face when outdoors and green backgrounds contrast greatly against the pinkish/brownish tones of skin. If you’re indoors, sit or stand next to a large window, making sure the window is on the side of your face and doesn’t appear in the photo. A large window is a popular source of light for many a professional photographer.
On your quest to becoming a better Phuket Photographer you will need beautiful places to capture and the fact we all live on one of the most beautiful places on earth is one of the reasons I believe there are so many talented artists on this island. Here are a few places I would recommend you go to practice your new found skills.
- Rawai Pier is one of my personal favorites as I lived near there for many years and you will see a few examples of it in this article. A great place to practice all of the above, beautiful in the daytime, nighttime and sunrise and sunset, it’s the perfect photographer’s playground with a collection of culture, architecture, and nature.
- Phuket Town is a bit different as it’s primarily street photography, with its hustle and bustle but mixed in there is some beautiful Sino-Portuguese architecture(straighten those wall lines), long streets (leading lines), and amazing temples that are bursting with color and textures that are going to look even better with all of the above methods.
- Bang Pae Waterfall is a favorite of many a photographer in Phuket and it’s great for some jungle trekking, lots of opportunities to find interesting frames using the surrounding foliage and after a 10-minute trek, you get to the actual waterfall. Waterfalls are a great opportunity to try some long exposure photography and seeing the water turn into a hazy dream! We would recommend an nd filter for waterfall photography if you want the best results or later in the evening as it’s darker which will naturally lengthen your shutter speed.
- Yanui Beach is a small beach a little between Rawai and Nai Harn beaches. As it’s quite shallow you can see beautiful clear blue waters with plenty of surrounding green islands and hills to play about with. This is very popular with wedding photographers for doing portraits. However, this is one of the locations that leads me onto a warning about being a beach photographer in Phuket.
One of the issues we have living in the tropics is humidity. Moist environments are the perfect breeding ground for mold which loves to grow on camera lenses! If you don’t know this already, the best way to avoid this is simply to store your equipment in airconditioned environments. As you progress as a Phuket Photographer and your equipment grow’s, then you may want to consider investing in a humidity box to store your camera equipment. Now for something that is more likely to affect all of us, salt water spray! Anytime I go down to the beach I’m sure to see a Phuket Photographer standing practically in the water taking pictures, unknowingly subjecting his camera and lens to salty water being blown onto it from the Sea. This salty water will destroy any coatings on your lens, it destroys electronics and eats away at just about anything. It’s also a great way to get a single grain of sand on your glass… then you go to wipe your lens and that grain of sand leaves a big old scratch. The sand and the sea is the worst enemy of any Phuket Photographer until you understand them. There are a couple of things you can do to mitigate any damage from this. Firstly wear a filter on your camera. The filter may be a polarizer which I’d highly recommend or perhaps just a clear and cheap UV filter. This will stop anything hitting your camera lens. Next is simply to beware of shooting in strong winds as the saltwater will blow quite far and I’ve had an expensive polarizer destroyed by unknowingly being covered in sea spray and not cleaning it fast enough.
One of the key methods in improving as a Phuket Photographer is to keep practicing! Don’t worry if your first few attempts are not perfect as we all have to start somewhere and practice makes perfect! The hobby or profession of being a photographer in Phuket is a very satisfying one as it’s easier than ever to have people view your art and get instant gratification or criticism.
If you enjoyed this article and feel like you’ve become a better photographer in Phuket as a result, please send us some of your best snaps for us to share on our channel.